When you need a photo for a Residence Card application or renewal, Machi Photos lets you use the 30×40mm Residence Card preset and continue through background adjustment, L-size sheet export, and convenience-store print reservation. Creating the photo, changing the background, retouching, exporting the sheet, and issuing the QR code are free. You only pay the store's L-size photo print fee if you print.
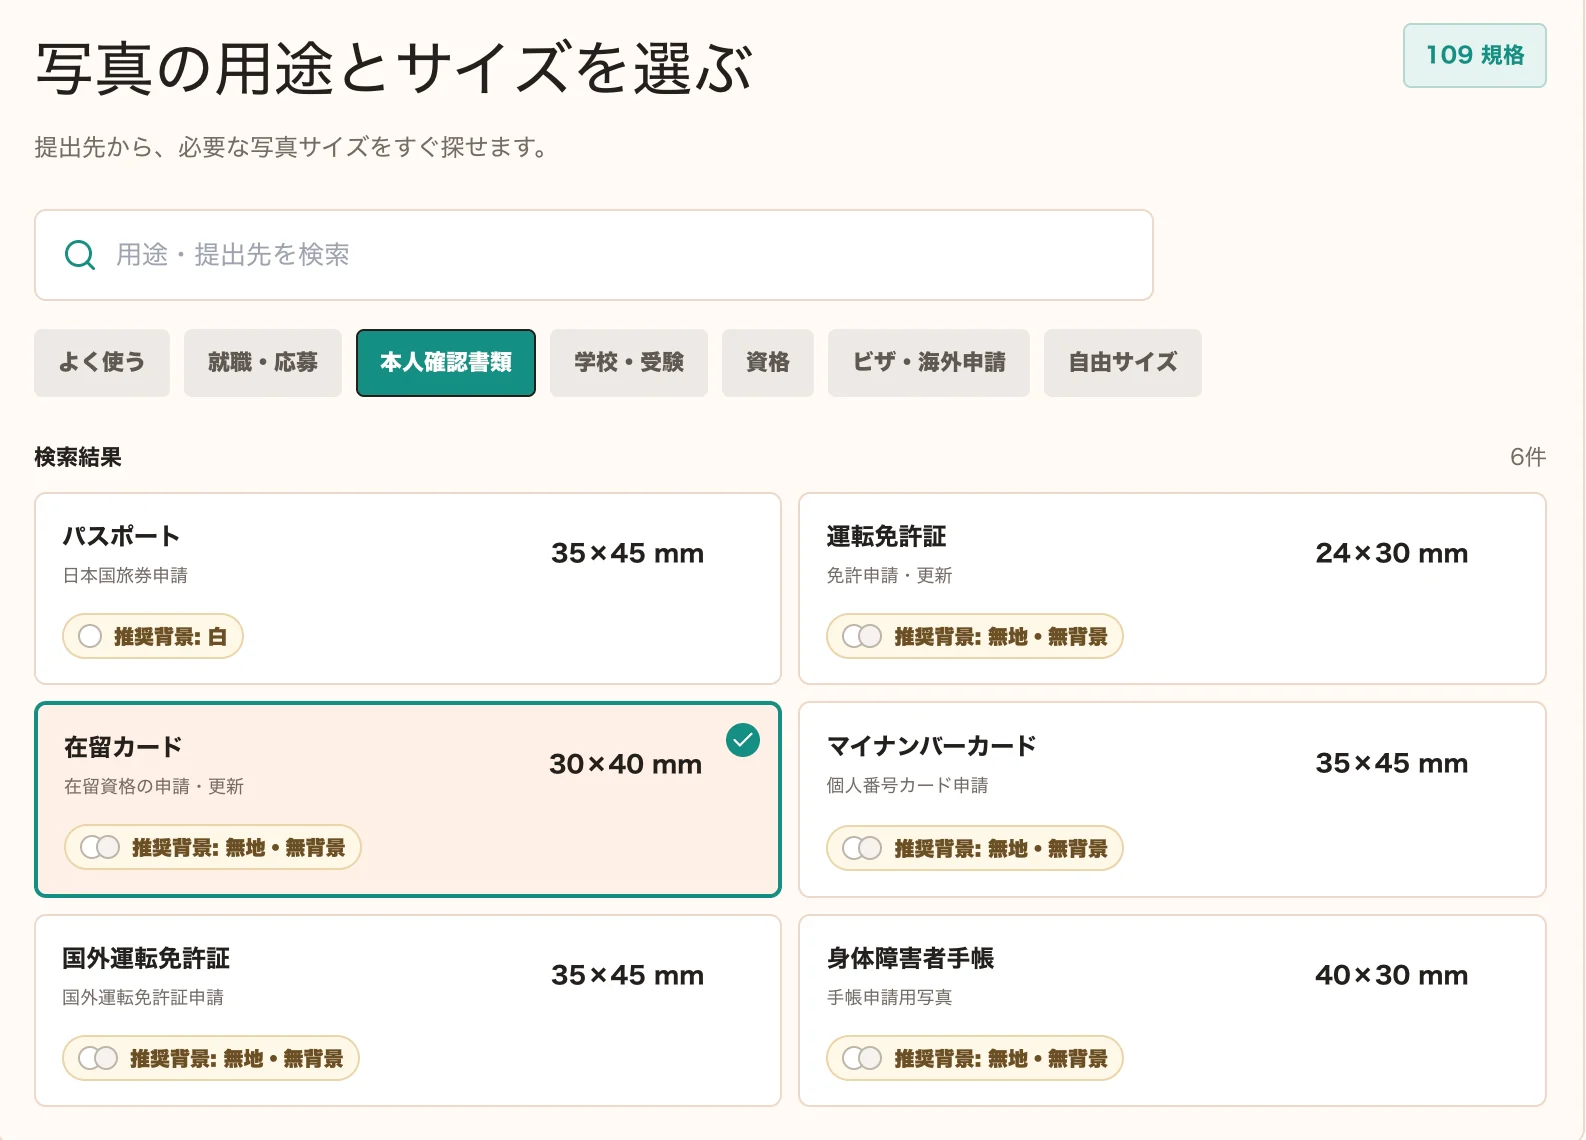
1. Choose the Residence Card size
Open the identity document category and select Residence Card. Machi Photos applies the 30×40mm size and prepares a layout that is easy to check with a plain, no-pattern background.
2. Upload the photo and align the face
After adding a photo, use the 30mm and 40mm guides to adjust the headroom, face center, and shoulders. Start with the original background so you can see the crop and position clearly.
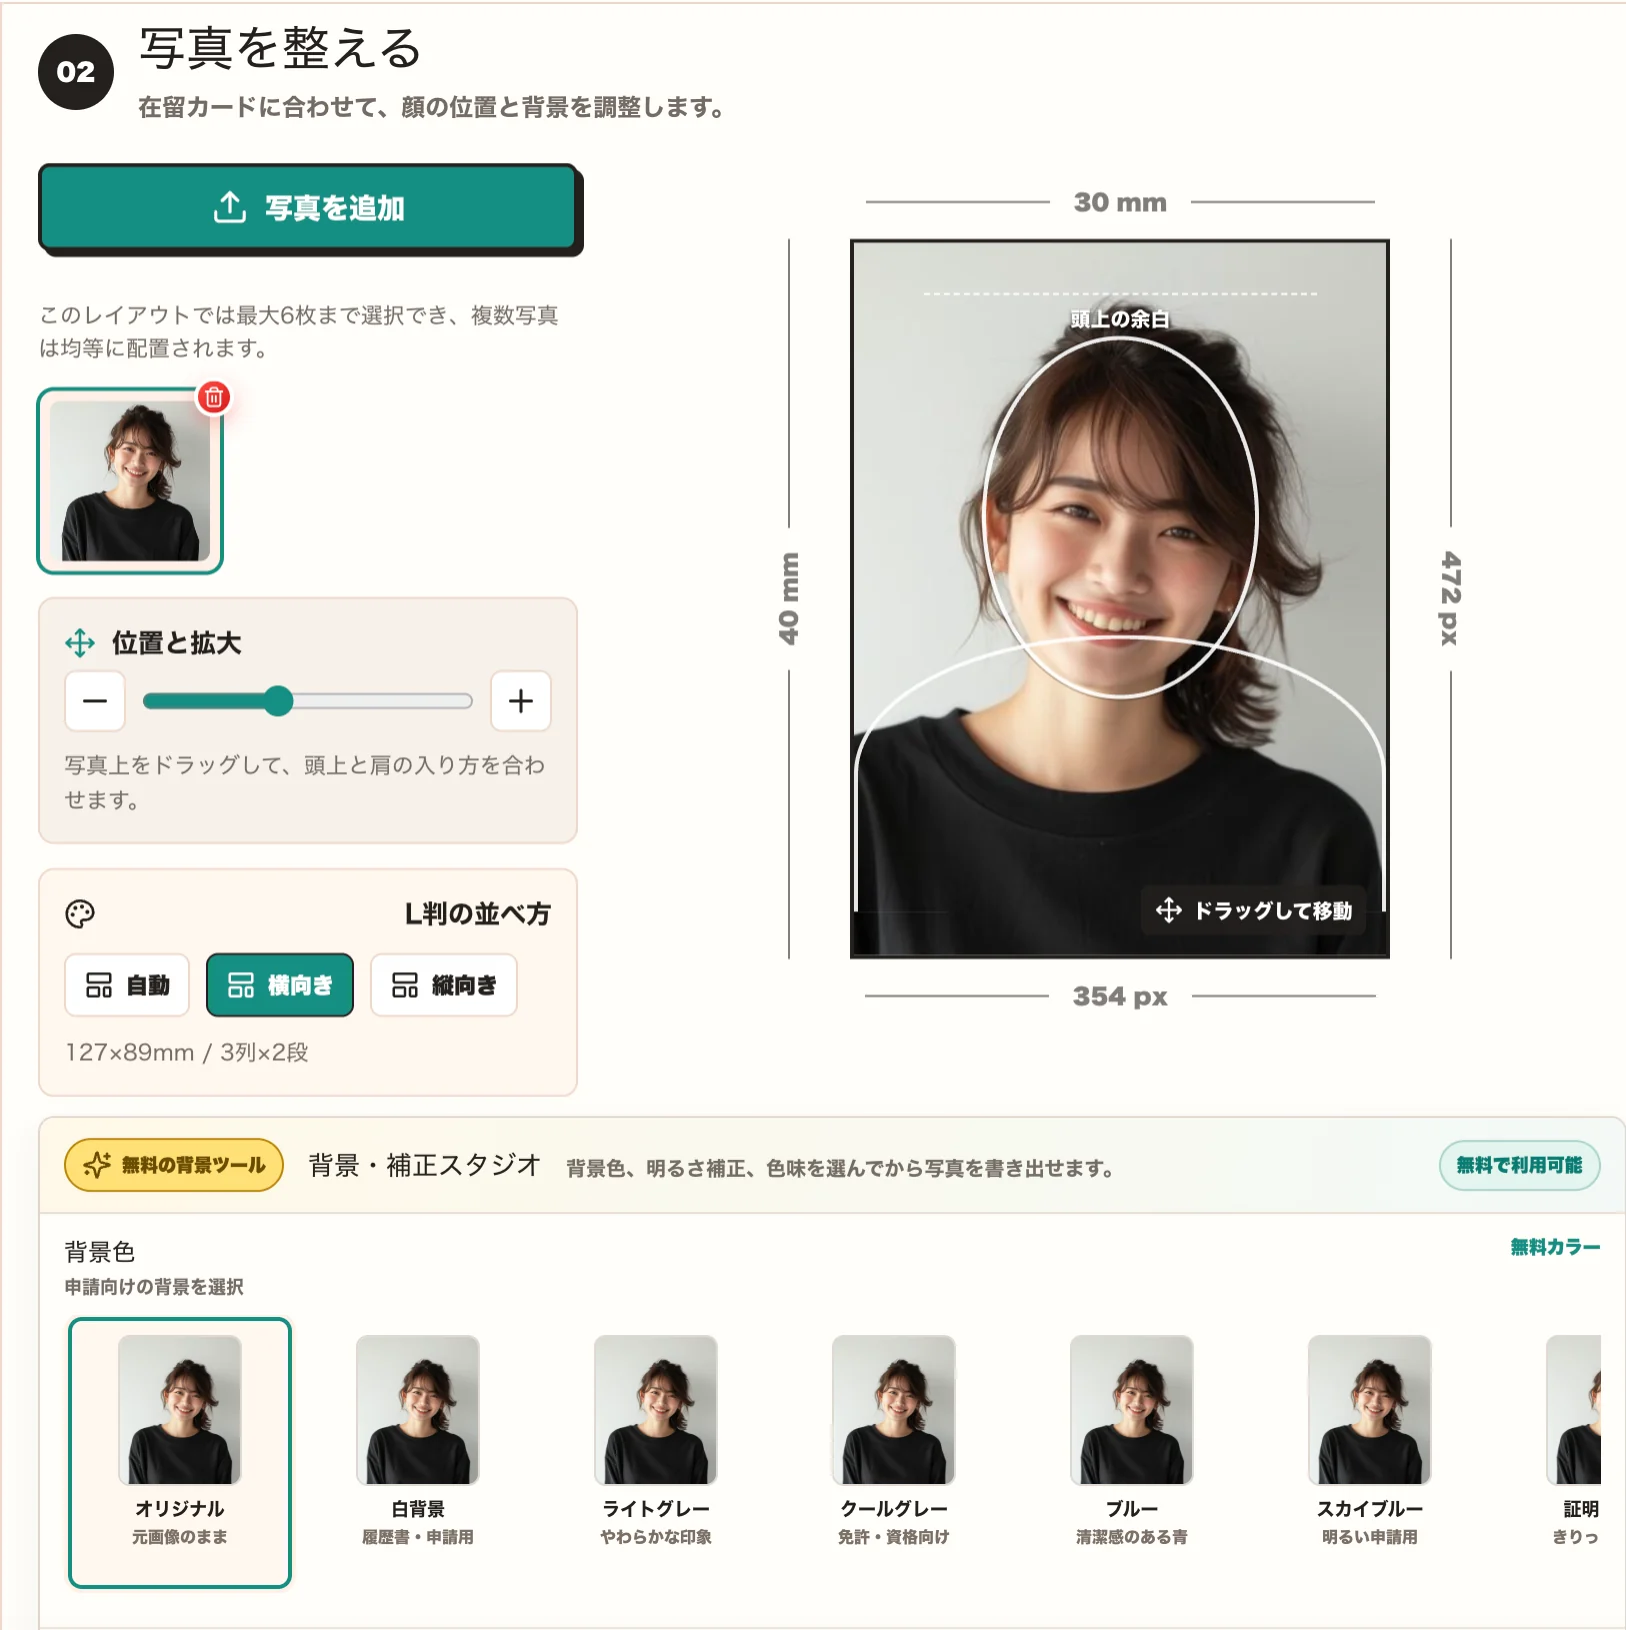
3. Clean up the background
If the background has patterns, shadows, or objects, switch it to a plain white background. Check that the hair, face outline, and shoulders still look natural, then adjust brightness and color if needed.

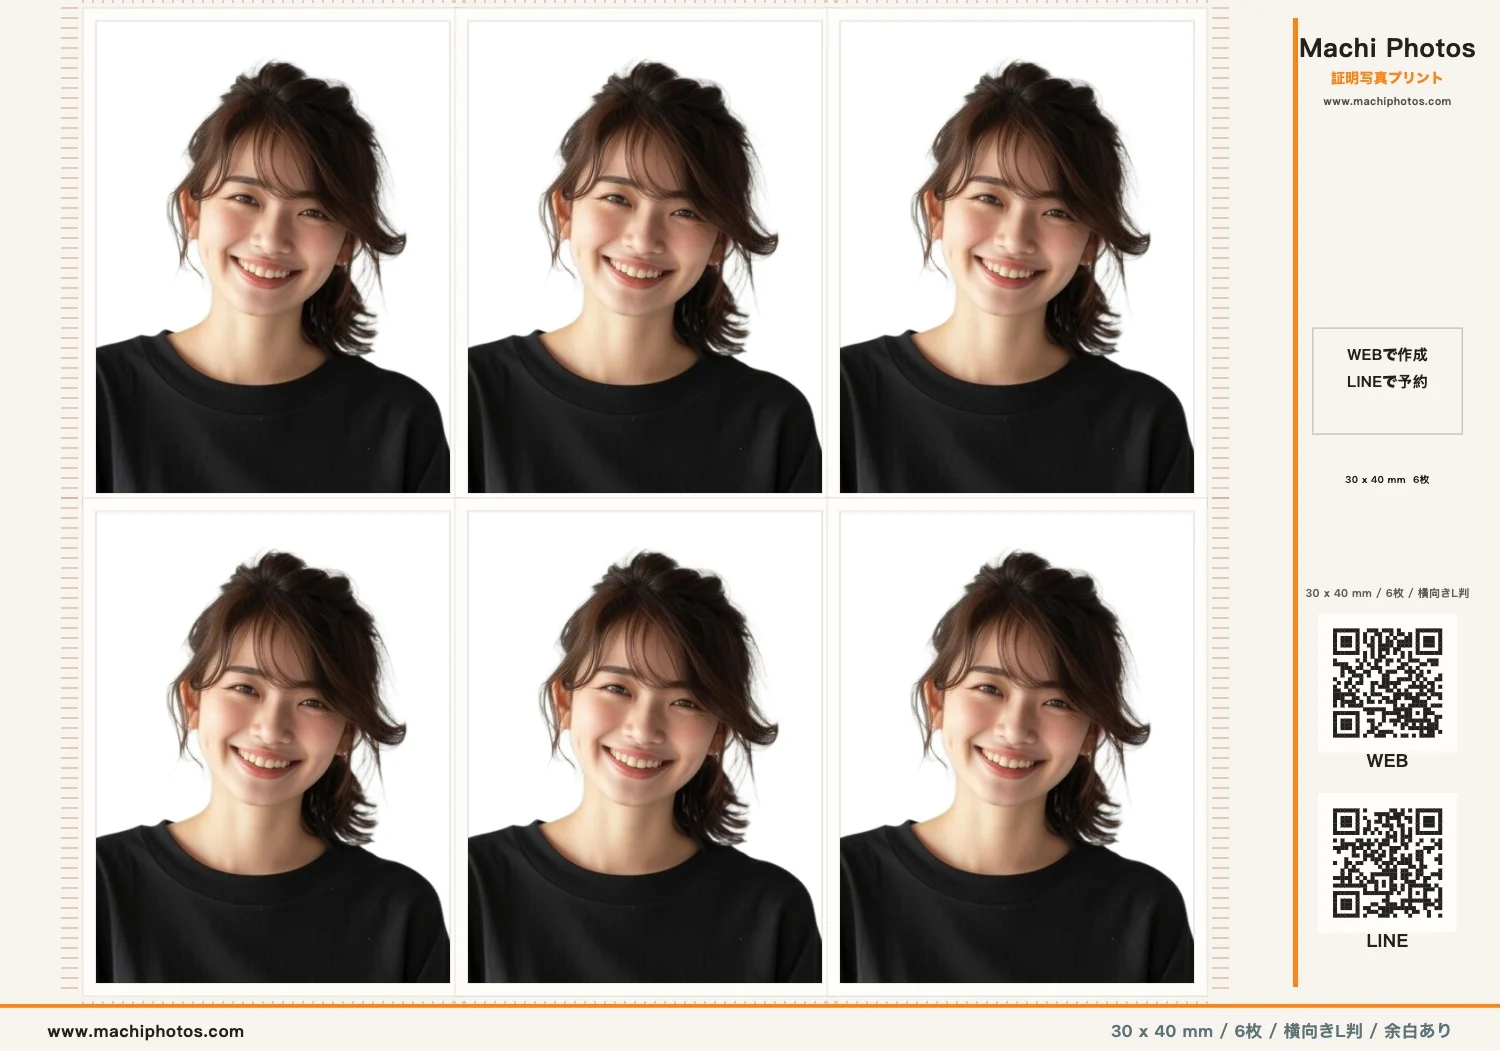
4. Export the 6-photo L-size sheet
Once the photo looks correct, export the L-size photo print sheet. The 30×40mm Residence Card preset can be arranged as 6 photos on one L-size sheet.
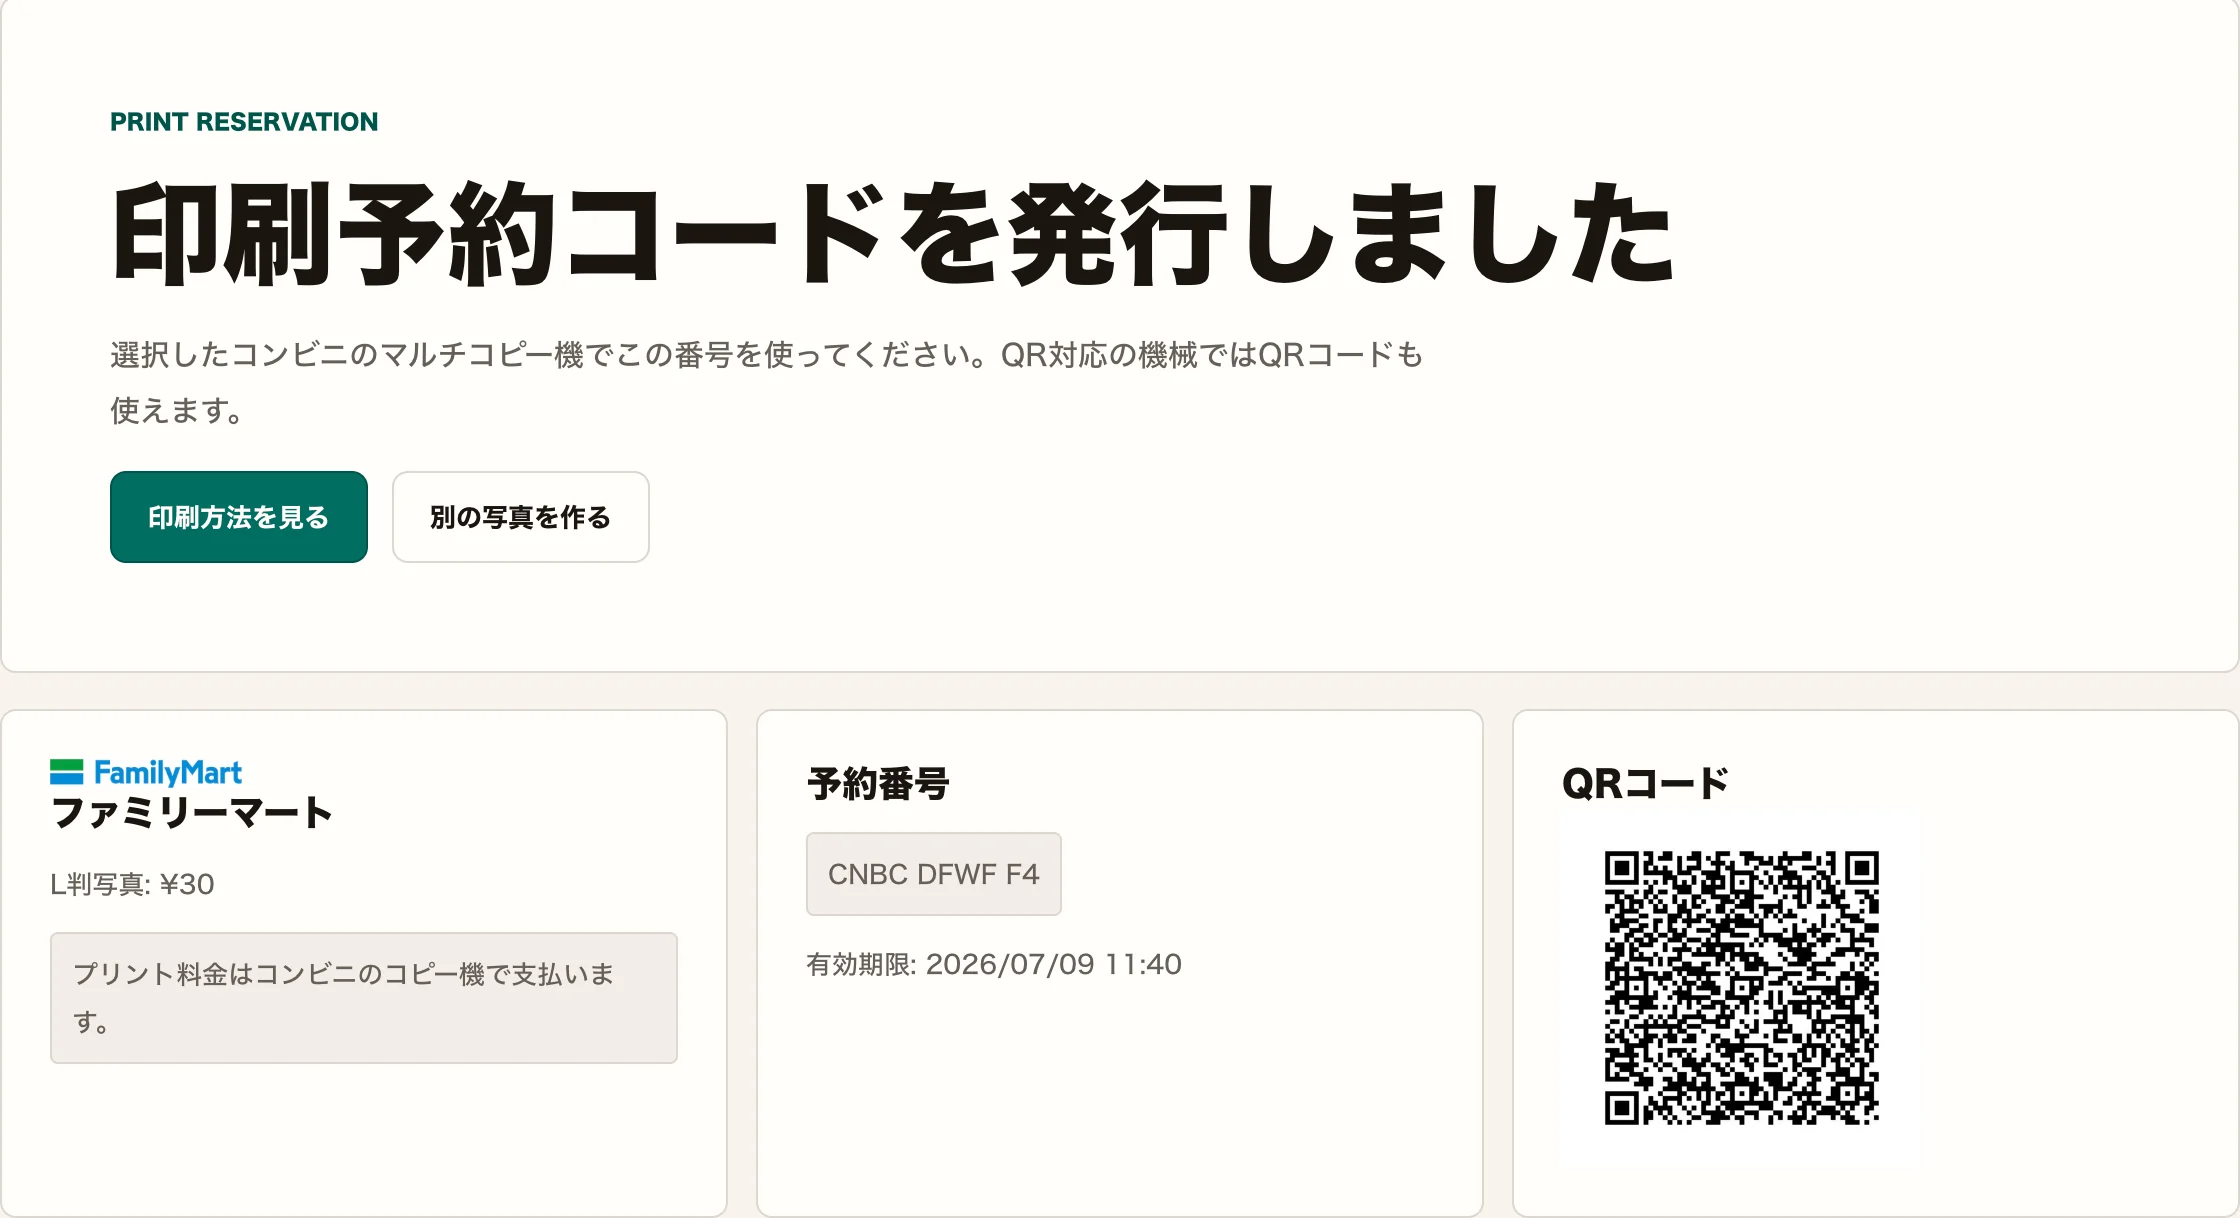
5. Issue a print reservation code
For convenience-store printing, issue a reservation number or QR code. Use the number shown on the screen at the selected store's multifunction copier.
6. Print at the store
Use the network print flow shared by FamilyMart, Lawson, Ministop, and Poplar. Scan the QR code or enter the reservation number, choose photo print, confirm L-size and copies, then pay.
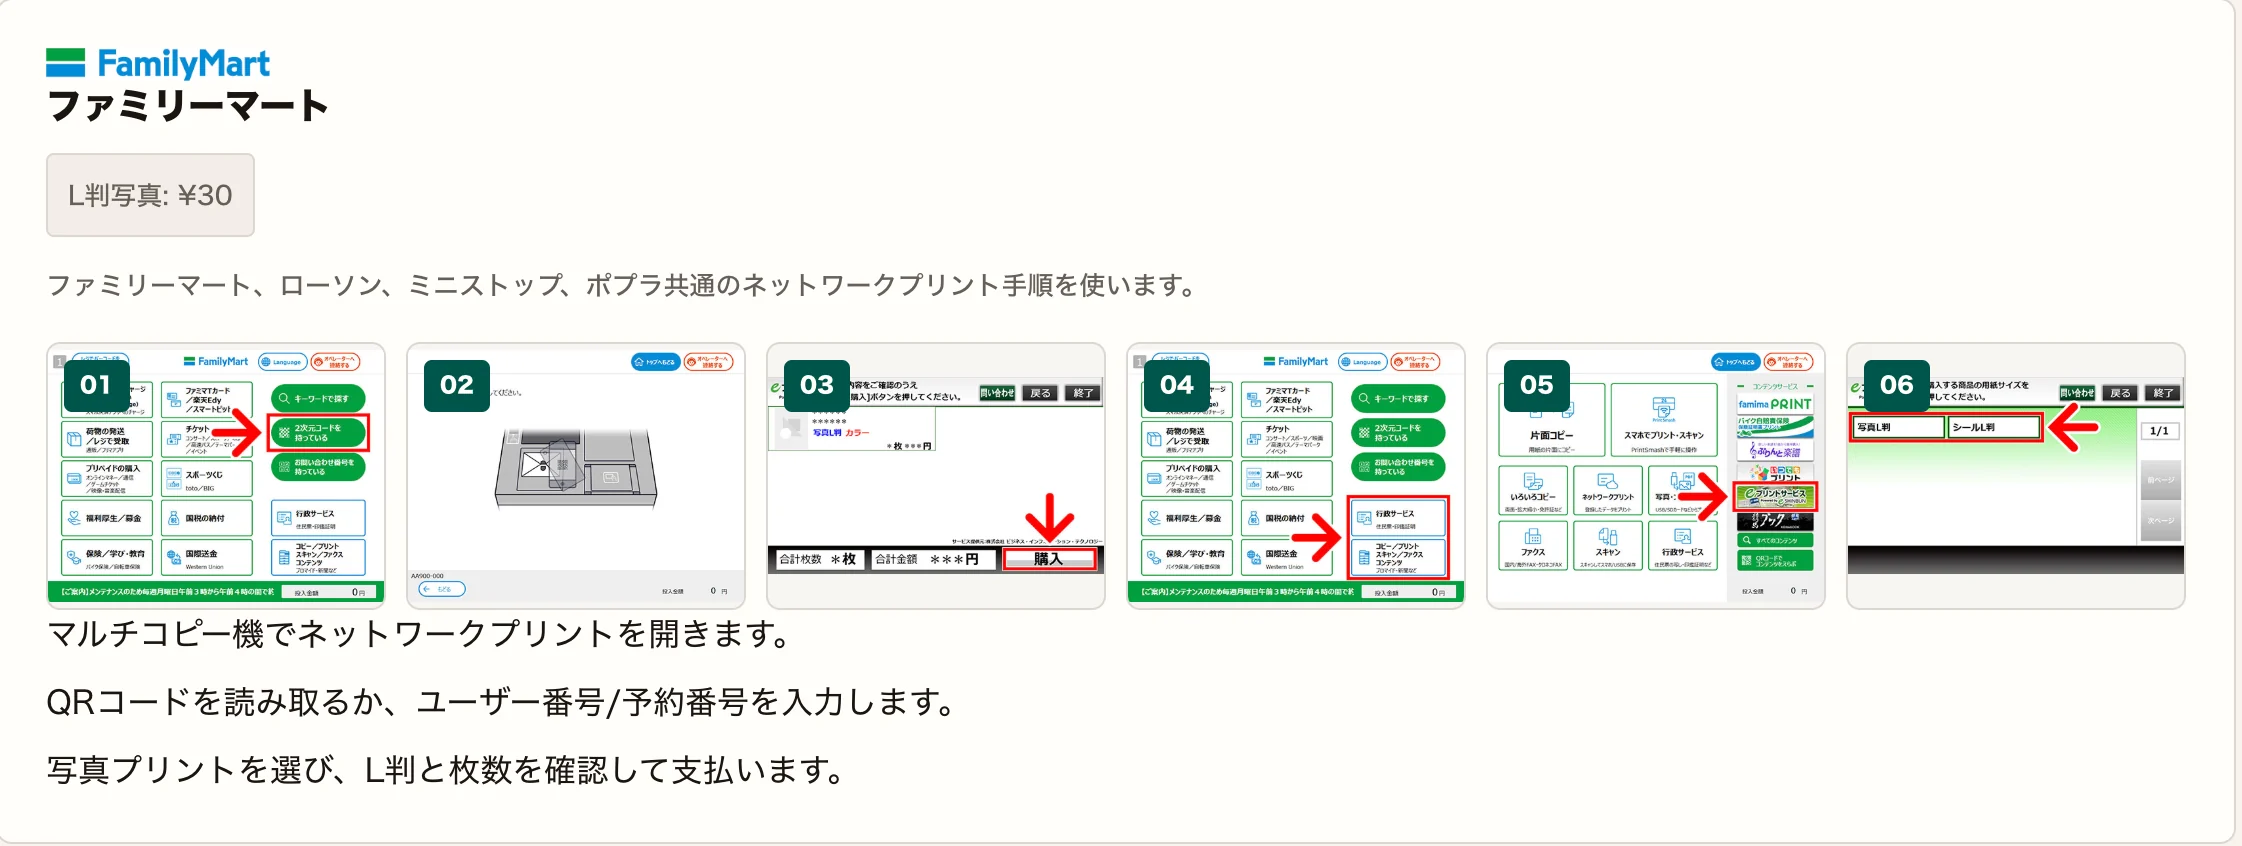
The print fee is charged by the convenience-store copier, not by Machi Photos. Confirm the price and number of prints on the machine before printing.
Need a 30×40mm Residence Card photo?
Create a Residence Card photo